Showing posts with label homemade food. Show all posts

Friday, February 19, 2016

Homemade Beancurd Tart

Alright this post were meant to be up last year because I made my own Beancurd Tart around Oct/Nov period. Pardon for the delay! For those who have my FB/Instagram would have already seen it way back then, oh well life's still busy even after the customary wedding is over. 

Nevertheless, I shall share recipe I used to make Beancurd Tart and also my personal experience.

The very first time I did the Beancurd Tart, it was a ultimate failure. I used those ready-made tart crust from phoon huat and to my horror, I bought the wrong type -_-". The tart crust was meant for Portuguese Eggtart (cripsy cripsy kind) and the tart crust don't taste similar to those being sold outside. I think I sort of under-cooked it. Anyway, I threw all away(even though the beancurd part was successful) on the first attempt.

Oh well, when it comes to baking, it really needs lots of patience just to get it right and with that I meant by attempting it again and again. 

I continued searching for recipes online and I came across quite a few recipes which involves making the tart from scratch. It doesn't seems difficult hence I attempt to do the tart myself this time round then. 

Here's the recipe for the tart crust adapted from: http://mymindpatch.blogspot.sg/2014/08/soya-milk-tart.html

Ingredients

90g unsalted butter, softened
45g icing sugar
30g beaten egg
150g all purpose flour
20g corn flour
1/4 tsp salt

Instructions

1. Loosen all purpose flour, corn flour and salt by stirring with a hand whisk.
2. Cream the softened butter till it becomes pale yellow. Add in the icing sugar and whip for about 5 minutes into a light cream. 
3. Slowly add in the beaten egg and mix well.
4. Fold in the flour mixture from (1) using an spatula till the mixture turns into a soft smooth dough.  Transfer the dough into a plastic bag and shape into a long dough. Let it chill in the fridge for 1 hour before moulding.
Avoid over mixing which will result in a tough crust.
5. Divide the dough into 12 equal portions.

Just some side information, I used a hand whisk throughout.

Anyway, I used Method 1 to create the tart shape instead of Method 2 as I do not have a cookie cutter at home.

1) Roll the dough into a ball and place inside a 7cm round mould.
2) Use your thumbs to press the dough to shape to the contour of the mould.
3) Scrap off the extra dough.
4) Use a fork to prick some holes at the base. 
5) Bake the tart shells in a preheated oven set at 180 degree Celsius for about 15 to 18 minutes, or till the tart shells turns slightly golden.

So that's how my tart shell look like after baking..


They smells really good. To be exact, it smells like baking biscuits :)


Derp and I took a few bites to try and we were very satisfied with the taste and texture.
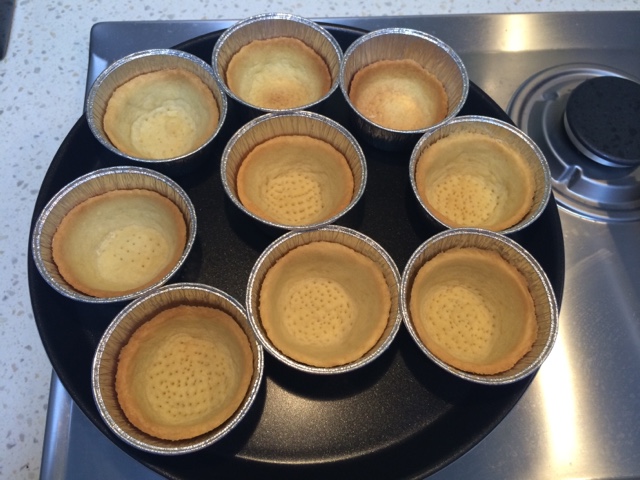

All the crust made that day.

Much excited because it was a success. I was more motivated to continue making the beancurd part then because I'm half way there

Moving on to making the beancurd ...

Again, the recipe was adapted from: http://mymindpatch.blogspot.sg/2014/08/soya-milk-tart.html However, I did made some modification to it because I do not have all the ingredients stated if not different ingredient being used to substitute it.

Here it goes..

Soya Curd Filling

It is recommended to use those non-refrigerate types of carton soya milk. From my past experience, those soya milk which need refrigeration, have problem coagulate using this recipe. -> I used Yeos Soya Milk(those 1 litre type, costs around $1 if I never remember wrongly)

Ingredients

450g low sugar soya milk
10g sugar
1 tbsp milk powder ( I didn't use this as I do not have any milk powder at home)
1/2 tsp agar agar powder (I used instant jelly powder from Phoon Huat)
50g low sugar soya milk
1 pandan leaf (optional) (I didn't use this too)

Instructions 

1. Heat 450g soya milk in a pot at medium low heat.
2. In a bowl, mix milk powder, sugar and 1/2 tsp of agar agar powder together. ->As I mentioned earlier, I omit the milk powder and for this step, I add in roughly 2 tsp of the instant jelly powder.
3. Pour 50g of soya milk to mix with the mixture in (2). Let the mixture stands for about 10 minutes to allow the agar agar powder to absorb the moisture.
4. Pour the mixture from (3) into the pot of hot soya milk. Stir regularly to facilitate the sugar and agar agar powder to melt. The agar agar powder will melt around 100 degree Celsius. Ensure there is no tiny grains of undissolved agar agar to give a smooth texture curd.

You may add in a piece of pandan leaf to enhance flavour.

5. To test whether the mixture is ready, scoop a tablespoon of the soya milk mixture to a cool saucer. Place the saucer in the fridge to chill for 2 minutes. If the mixture coagulate after 2 minutes, you can stop heating the mixture.
6. Pour the warm mixture into the tart shells and allow them to cool to room temperature before transferring to the fridge to chill.
7. Allow the tarts to chill for 15 minutes. The tarts are best consumed about 5 ~ 10 minutes after leaving the fridge  :)

Keep the unconsumed tarts in a closed container to prevent the bean curd from drying up.


Just to take note, how 'q' you want your beancurd part to be depends on how much instant jelly powder/agar agar powder you add. Initially, I only added in 1/2 tea spoon jelly powder and they don't coagulate that well.

Hence I had to slowly add in till I get the texture(making sure they harden after it's being placed in the fridge). No harm adding in a little more rather than not enough because those powder needs time and heat to be dissolve.


After pouring the filling into the tart..


Before putting them in the fridge :) 

The very next morning, I can't wait to try it to see how it turns out..


The overall taste was good (especially the crust), texture of the beancurd can be improved as I find it to be slightly too soft but I'm glad they did 'harden' up. Perhaps I've to experiment putting in more instant jelly powder so as to get the texture right. 

That's all for the beancurd tart making process :) I'll need more time to perfect the tarts and if I ever did it, I will share it here then! I personally feel beancurd tart is a manageable homemade dessert for beginners. So do try it if you are like me who loves beancurd much! Who doesn't right? :) 

Wednesday, November 11, 2015

Homecook Korean Army Stew (Budae-jjigae 부대찌개)

On the night of polling day, other than making mooncakes, we also have a go at Korean Army Stew

The ingredients were pretty simple and it's easy to prep and we just have to utilize the underuse pot given by MIL. Till date we only used it twice, once for steamboat during CNY and this time round for the Korean Army Stew

We find it no point to use it especially when there's just the two of us. No diff from using normal pot and just cook right? haha. 

I prepared the stock for the soup few hours prior to dinner time. Basically I stuff lots of anchovies into the soup bag and dump it into the pot (after the water is boiled) and let it cook. In order to let the soup have more 'taste', I think the total time taken to prepare the stock were more than an hour haha! 

When everyone arrives, we then start to place all the ingredients in for cooking. 


That's how it looks like after we put in all the ingredients. 

Our ingredients:

1) Crab Meat
2) Spam
3) Tau Kwa 
4) Kimchi
5) Hotdogs
6) Enoki mushroom
7) Baked Beans (which we only add in after it's boiling)  

Actually you can just add in anything you love to eat during a normal steamboat session. We should have bought marinated bulgogi meat to add in but totally forgot about it. If not it will be yummier!  


We also added in 2 tablespoons of gochujang sauce. I believe gochujang sauce is the most important ingredient because it contribute to the taste of the soup the most. 


Time to add the instant noodle after our ingredients are almost cook! 


Not forgetting a slice of cheese each to add more taste to the soup :) 

The soup wasn't that 'thick' in the first place so we did add a few table spoons of chicken stock into the soup. But after the cheese melts, everything taste good hehe.

Korean Army Stew is very easy to prepare and to have it at home and all you need is just the hotpot machine at home! Totally don't mind preparing it again next time because it's quite costly to eat it outside. Nothing beats homecook food yea? :)

Tuesday, September 22, 2015

Homemade Snowskin Mooncakes

The Mid Autumn Festival is just around the corner and to be exact happening in less than a week time! Just weeks back (on the night of Singapore's General Election), I tried making snowskin mooncakes. 

Many baking enthusiasts have started making mooncakes, be it traditional type or snowskin type few months ago. Practice makes perfect :) 

After seeing so many homemade mooncakes post on the Facebook baking group, it sparked my curiosity. Hence, I went to find out how to make snowskin mooncake because everyone seemed to be doing it. It wasn't as difficult as I thought it will be because the ingredients are simple as it requires just a few items.

I even saw people making Hello Kitty shape snowskin mooncake and sharing it on Facebook. It looks just like those Hello Kitty mooncake that Breadtalk is selling(price near to $60 for 4 Hello Kitty moon cakes), totally not worth to buy it! Why not make it yourself? :) 

To be honest, the ingredients for mooncake are quite affordable and it can be used to make lots and lots of mooncake (especially the filling). 

It was a last minute decision to make snowskin mooncakes together with my BIL and SIL. They were already coming over for dinner on GE night and decided on cooking Army Stew for dinner (will blog about that some other time). Making mooncakes have been added to the itinerary since the mooncake mould came earlier than expected!


This is the mooncake mould which I've waited excitedly for :) 

The mould can be bought from here. They may not sell the mould at the cheapest price on Qoo10, but the delivery is really fast and the quality of the mould is as promised. No regrets paying slightly more for the fast delivery.

Hereby introducing you the ingredients we have used to make Snowskin Mooncake :)


Ingredients for Snowskin Mooncake:

1) Sugar Free Green Bean Paste
2) Sugar Free Red Bean Paste
3) Snowskin Premix
4) Shortening(the one in the tupperware)
5) Green Pandan and Purple Yam flavour coloring. 

All these can be bought from Phoon Huat. You may visit their website as they have lots of branches around Singapore. We decided to make 2 different flavors of mooncake hence that explains the 2 different coloring and 2 different paste. 

Phoon Huat has this snowskin premix which helps save time. If you do not wish to use the premix, you can actually substitute with Kao Fen( Glutinous Rice Flour) and Icing Sugar. The advantage of not using the premix will be you can adjust the amount of icing sugar to your own liking :) You can google for the quantity of each ingredient if you will like to. 

This is the quantity that we used for the mooncakes (Yields around 20 mini mooncakes, I can't remember exactly the quantity):

1) Snowskin Premix 290 gram
2) Shortening 56 gram (Can used slightly lesser as this is fats! But not too little if not the whole dough will be too dry )
3) Desired Coloring 10 gram.
4) Water 140ml.

The instructions is pretty simple and is as follow:

1) Pour out the snowskin premix into a bowl.
2) Mix coloring and water together.
3) Get ready the shortening while letting the dough to rest for 15mins.
4) Mix snowskin premix with coloring.
5) Add in shortening.
6) Prepare paste and divide into 24 gram each (we used 20gram each because we doesn't have a digital weighing scale).
7) Divide dough into 20 gram each.
8) Flatten the dough and wrap the filling in it.
9) Freeze it for roughly half and hour.


This is the video from Phoon Huat teaching you how to make snowskin mooncake. So for better illustration, you can watch it! :) 

After typing so much, here are some of the photos from behind the scene! We lay baking sheets all over the dining table to prevent dirtying it. We did all this while waiting for the announcement of GE results till the results are announced. The ingredients that we bought were enough for us to make lots of mooncake.

We took turns to knead the dough but frankly speaking, it requires some strength to do it. Not as easy as it seems on the video lol.I couldn't even out the coloring so I passed on to the next person to do it. So yea, you can imagine the dough went through quite a few of our hands lol!


Starting it was quite dry and we thought something went wrong. I remember at some point of time we added a little more shortening to reduce the dryness just so to get the smooth dough. 


The dough seems much better now. 


The only behind the scene photo. Our hands are all too oily! They may not look oily at all but it's actually very oily. In short, mooncakes are really sinful especially snowskin mooncakes! 


Our first batch. 

We didn't make the mooncakes that fast because there's only 1 mooncake mould so we took turns. 

And here comes the GE inspired mooncakes by the 2 guys lol. Seems like they got bored using the cute kind of mould.


No prize for guessing which political parties are those. :)


Another familiar looking political party logo.

The 2nd batch of mooncakes with a different coloring being used. 


More political parties' logo appearing lol. 


All the GE inspired mooncakes made that night. #GE2015

We did tried a few mooncakes that we have made and they tast better that what we expect (even though the appearance may not seems to be right lol). 

I gave it out to some friends who came to our house the very next day for wedding-related stuff and they praise that it was well made.

It seems that the mooncake making session was successful. Perhaps next year we should learn how to make durian snowksin mooncake instead because that will really save us lots of money then! 

That's all for my homemade mooncake entry and Happy Mid Autumn in advance! 

Saturday, February 28, 2015

Happy 9th Valentine's Day!

The 9th Valentine's day was nothing fanciful but yet the most meaningful Valentine's day we have spent till date.

Celebrated it as Mr and Mrs, and also at our new place. Totally different feeling even though it may just be another weekend for us :) 

Derp never fails to give me flowers on this special occassion. Be it 1 stalk/3 stalk or 12 stalks. Last year Valentine's day, he even handmade it himself :) 


The roses this year...Thanks :)


The red velvet cake which I bought from Petite Bakehouse just below my block. Got it off the shelves 1 day before Valentine's Day. 


I do thought that it was quite big but actually because it's only one tier. So we probably eat 2-3 slice each at a time. All the calories are worth it because it's really nice. One of the better red velvet cakes I've eaten till date. 

Since we didn't go anywhere far except to the nearby mall to run some errands, we decide to take more photos at home then. Don't  wish to let the flowers go to waste lol. 


 Happy 9th Valentine's Day Derp! 


Okay enough of my selfie, and so we did home cook dinner as part of our Valentine's Day celebration. Everywhere is crowded/overrated/overpriced so we reckon home cook dinner is always the best choice.

Furthermore, I was quite busy with all the CNY preparation hence not much time/mood to really celebrate Valentine's Day. Everyday can be Valentine's Day right? :) The whole day I was busy till it's time to cook our Valentine's Day dinner.

We bought fresh sirloin steak to cook it for dinner. First time cooking steak, so excited! Normal days we dare not because they are not really cheap and I'm really afraid to overcook/undercook it without knowing it and it will be so waste.

But for this Valentine's Day, we shall give it a try! This fresh sirloin steak costs $7 each.


The finished product - Black Pepper Sirloin Steak with Prawn Aglio Olio.

The steak was suppose to be the main lead but Derp close the lid of our grill pan to keep the steak warm after cooking. 

But who knows that action caused the steak to shrink a lot and all the juice of the steak were forced out. In the end, the steak was really small but still yummy, just doesn't taste juicy lol. 


Our Valentine's Day dinner!


Not forgetting we match it with the Moscato which Derp bought the day before too haha! It's his current favorite whereas I still much prefer red wine :) 
Happy 9th Valentine's Day Derp and thank you for the roses! Love ya!

Sunday, March 02, 2014

Home Cooked Dinner for Valentine's Day 2014!

We had our early valentine's day celebration at The Tiramisu Hero, and on the actual day, we decide to have home cooked dinner :) 
Because everywhere is overpriced and crowded on the actual day, home cooked dinner is the best solution out then. It's been awhile since I last cooked for Derp. I started prepping for the dinner the night before the actual day. I chop up all the garnishes like chilli and garlic because Derp loves spicy stuff! 

Here are the ingredients for the home cooked seafood aglio olio..

Fresh prawns bought on that afternoon.

Scallops! (Koped a few from the frozen scallops that my dad bought haha!)
It's my first time adding scallop into my aglio olio, in the past I just make do with the prawns. 

Chilli and pasta! 

First of all, I boiled the pasta because that always took the longest time. It's my first time cooking this kind of pasta too. Not much of a different from normal spaghetti, infact they are easier to scoop out and transfer here and there. 


I pan fried the prawns and scallops with some garlic and chilli so that eventually the taste will goes into the ingredients.  

My first time handling scallops too, I totally can't tell whether is it cooked or uncooked because they are too white lol! I can only try using a fork to poke through it to see if it's cooked anot. I don't wish to overcook it because I wished to retain the q-ness of it. Oh and I guess the heat has forced all the juice from the scallops.

I then pour the pasta in and cooked everything together for another 5 minutes or so. 

The final product..


I spent less than $10 to make all this hehe! 

Derp and I have already made a pact to cook at least once or twice a week after we shift into our new home, tiring as it may sounds but we are often stuck with the question of 'what-to-eat' almost every night. :S. We would rather cooked than to stand in the middle of a food court and ponder 'what-to-eat'

I cooked this without the help of Derp! When he reached home, I'm just done.

Dinner time!
Enjoying my creation..

:)

No fresh flowers for me this Valentine's Day because I'm having another bouquet of fresh flowers on my ROM the week after. I don't have the habit of drying my roses and at the end of the day, they usually end up in the thrash bin.

Derp decide to give me hand make roses this year instead. I only know it the week before because he told me he got no time to do it behind my back(because we are staying together), so he got no choice but to do it infront of me lol! 

Anyway, it's the effort that counts because I started interviewing him when did he actually started learning how to make this paper roses, how come I didn't know haha! So he did caught me by surprise before valentine's day :)

The stalk of the rose were also handmade by him. Honestly speaking, I'm always impressed by his need-to-do-things-perfectly attitude. His needlework is also much better than mine, and also his ironing skill lol! 

He made 11 roses and not 12 roses because 11 roses meant "You are my treasured one; the one I love most in my life" and 12 roses meant "Be my steady".


My Valentine's Day Bouquet. This bunch of roses will definitely has a spot in our new house.


:) 

Thanks Derp for the roses and cheers to our 8th Valentine's Day! 

Sunday, March 10, 2013

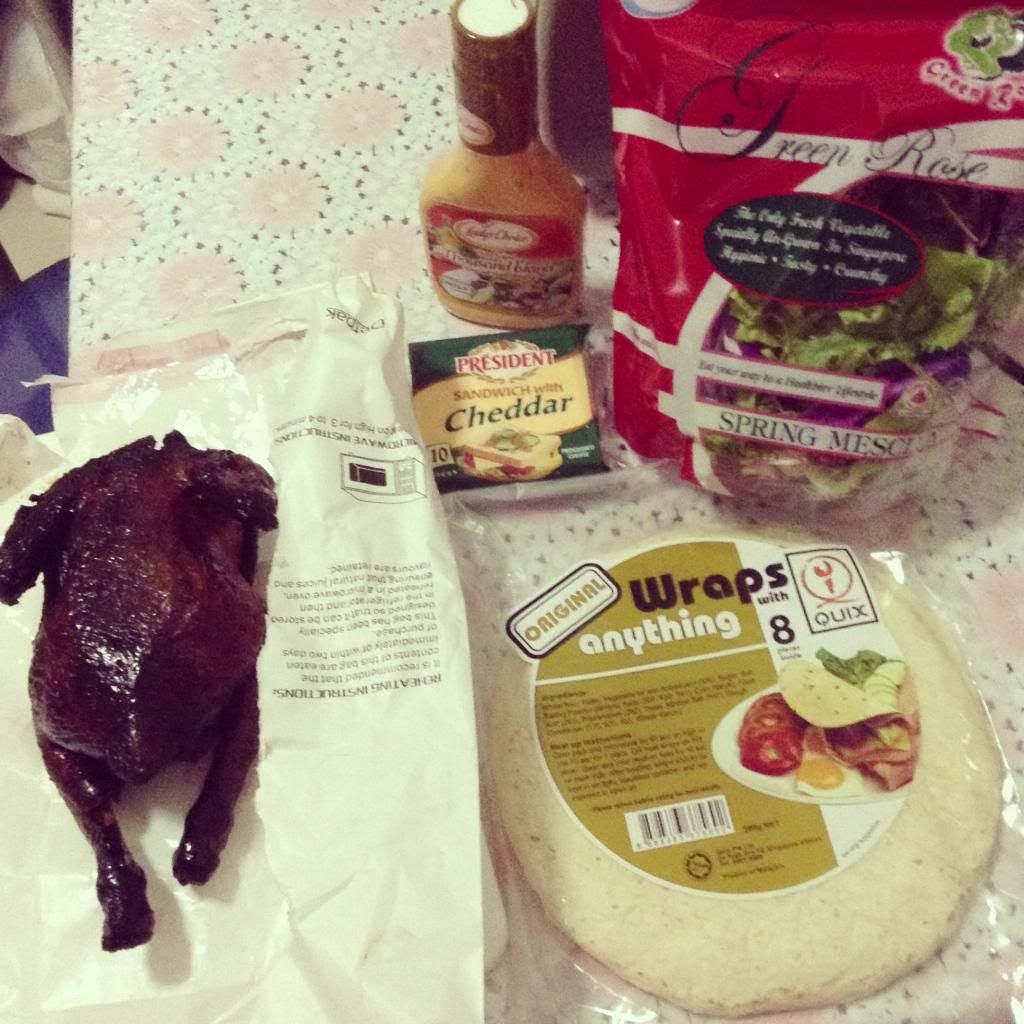
Chicken Wraps, Smoked Salmon Wraps, Jap curry Rice :)

Decide to make wraps for dinner earlier this week. Sometime I just dont know what to ta bao and yet I wish to have something healthy for dinner.

I bought everything that's needed to make wraps from NTUC :)

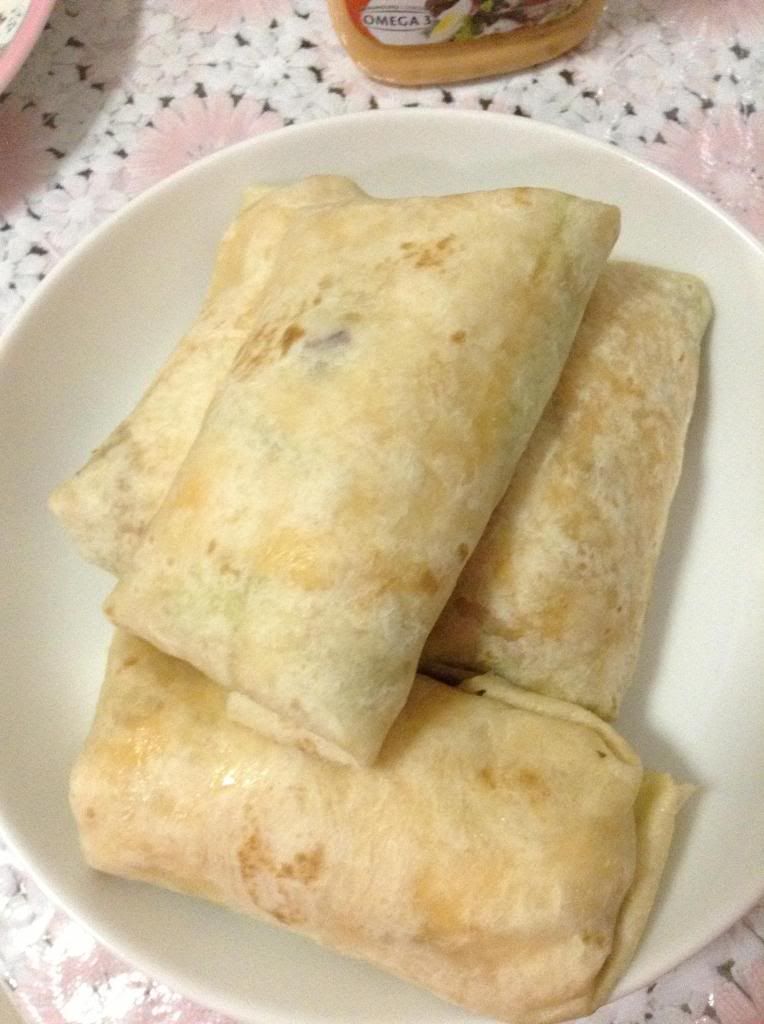
Ready to eat roasted chicken, president cheddar cheese, wraps, salad veggie and thoousand island sauce.

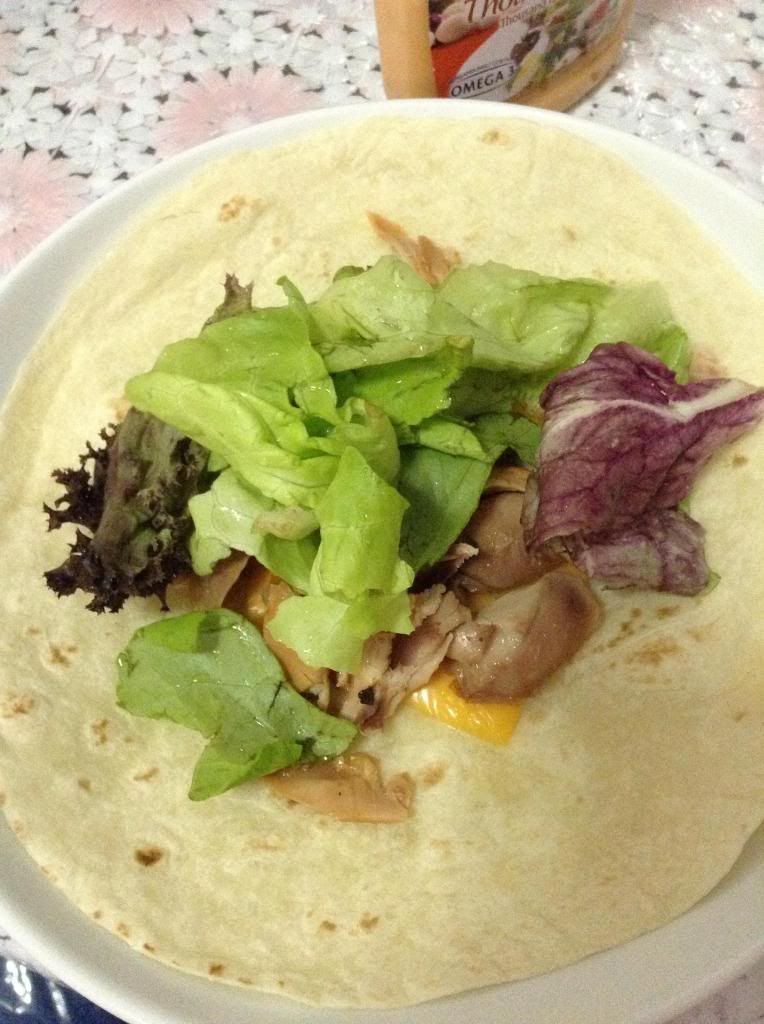
Toasted the cheese on the wrap first before putting veggies, chicken meat on it. Didn't really put thousand island sauce cause actually is quite nice liao hehe.

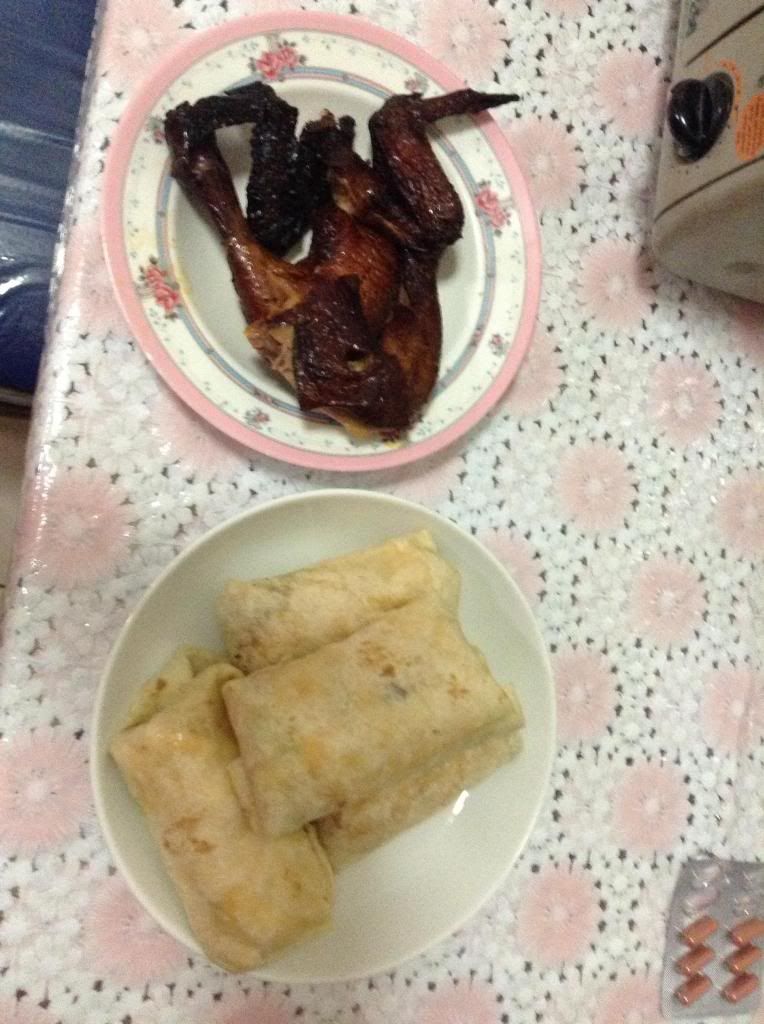
Made a total of 5 wraps, 1 for my mum and 4 for boy and me.

Boy did the chopping of chicken up, while I'm in charge of the veggie, toasting of cheese on wrap :)

Dinner is served. The wings and drumlets we ate it seperately.

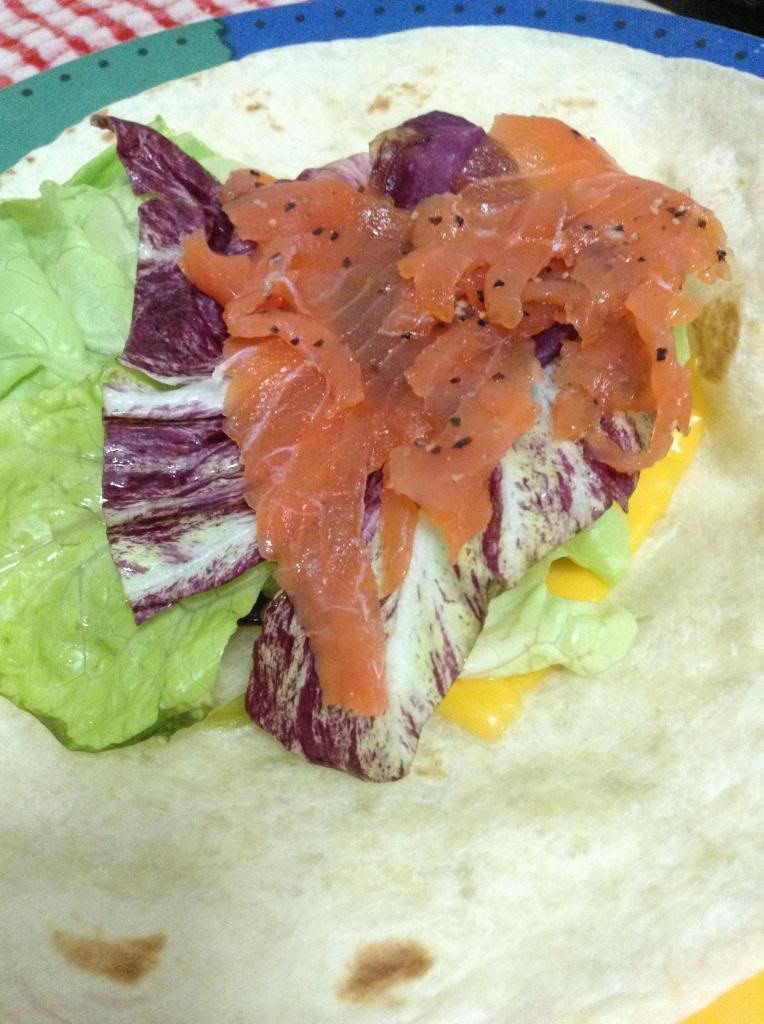
I went after work on tuesday and it always ended late. Went NTUC to get black pepper smoked salmon(I actually saw it when I buy the roasted chicken that time and tell myself to try smoked salmon wrap next time) to make wraps again.

It tastes as nice too :) Actually it is easier to make than the chicken but more costly. :(. If not I dont mind having it more often.

Few days back, boy and I cooked japan curry for dinner. I've bought the curry cubes quite awhile ago and have been wanting to try cooking it. I bought the medium hot one. Its really yummy!

Boy prepared the carrots, potatoes and onions before i reach home to cook the rice haha.

If I have a air fryer, I would air fry some pork cutlet and use my happycall to make omelette to match with jap curry. Damn shiok! Shall try it next time when i move in to my new house haha!

Btw boy and I went to get the hot curry cubes instead of medium hot. Shall challenge it soon and I can't wait to cook jap curry again :)


The really hot jap curry we try before is from coco ichibanya, really make us sweat and I can't really finish the meal. If you're looking for some real hot jap curry, go try the one at coco ichibanya, if I never remember wrongly is the level 2 curry instead of level 1. The level 2 is really hottttt!

It's been awhile since i cooked my most 拿手 prawn aglio olio,  I will cooked it soon too :). stay tuned.

Btw, I was super fed up with my  blackberry for the whole of last weekend. My blackberry touchpad can scroll but i can't click. I'm thinking of repairing it or just wait for the white ino plus to be launch. But i think sooner or later i confirm need to get ino plus because my blackberry like going to die anytime though i haven't use it for a year yet. -_-". If i repair it, i got to use back my E51 for like 1-2 days while waiting. Tried turning my E51 on and it's still working fine. Nokia phones are really lasting. I shall see how long i can ta han my blackberry.

Follow me @ firstl0ve88 on instagram and formspring me at http://www.formspring.me/firstlove88 if you have any questions :)